

By James Watton
Making SUL Jigs and getting the most out of our lure fishing potential.
My lure fishing journey started 10 years ago, and back in those simple times we all fished with what amounted to pike tackle scaled down to best match our target species. Being based in the Midlands and about as far as it’s possible you can get from the sea, my target of choice at that time were the local perch and the even more appealing alien and enigmatic zander.
A nice Rudd snatched up a cut down Trout worm presented on a slow twitched retrieve up in the water on the local canal.
At that time the standard approach was a braided line to eighteen inches of ropey trace wire dressed with a swivel at both ends. A snap link and split ring would connect the jig which would inevitably be a wide gauge forged hook of two thirds the length of the chosen sized Kopyto paddle tail.
This always felt wrong to me. Overly fussy and heavy handed, scaling down rigs meant for monster pike, when pike, if I’m honest are the last thing I want to catch. So being a Design Engineer by trade I was soon looking for ways to reinvent the rigs I was using.
My approach then, as always, being observe, adopt, and improve. I set about researching tackle and techniques from home and abroad taking and modifying fly fishing, coarse fishing, drop shot, ned rigging, traditional Japanese stream fishing and closer to home light rock fishing.
Light game rods in the 5-20g range gave way to smaller trout rods and finer lines, 2-10g becoming the norm and just on the edge of primitive ultra-lite tactics. What happened next set the trajectory for my thinking, I caught a roach on a lure.
As lightbulb moments go this is fairly tame, but the principle was there. The canals I was fishing were full of silver fish and mini species that could conceivably provide sport when the perch and zander didn’t want to play but how could I target them specifically.
How about all those tench and bream I regularly saw patrolling their feeding grounds? Could those be fair game on this new gear?
Throughout all of this I came to one conclusion, I needed to go lighter!

A good Tench fell for a 10mm frog imitation mid-water on a 0.13g size 16 jig.
What’s lighter than light? Ultra-lite. This was an emerging niche in lure fishing at the time and some specific lures were being stocked. I have fond memories of 1 inch Crazy Fish Polaris worms, those being the go to bait at that time.
The question remained though, how far could I push this? What’s beyond Ultra-lite?
Enter the SUL. Super Ultra-lite or stupidly Ultra-lite as I like to call it has been a thing now for about 3 years as far as I can see, but I’m sure other people had been doing this before I started playing around with it.
Getting into the 0.5g range and onto hooks below a size 12 provided access to a whole new range of species. Now anything was fair game but here was where the problems started. The smallest commercially available jigs were and still are generally in the 0.5g size 10 range and in a wide gauge wire and a barbed hook. This lacked the finesse I wanted to impart in my fishing.
The next alternative was a split-shot rig in which any hook can be used on a fine leader line and a suitably sized split-shot being used to impart enough weight to cast or more commonly descend the lure into a likely looking hole or rockpool. This technique beloved of the LRF community was getting me closer to my goal.
The problem with this for me was two-fold. Firstly, the rig will pendulum on a retrieve making the lure move faster than my target species would tolerate and secondly, the weight itself would be mistaken for food by roach or dace and result in false takes often enough to be a nuisance.
The next logical step was swapping the split shot for a tungsten bead in a loop knot behind the hook. A pair could be tied in and create more attraction through the beads knocking together. Couple this with a floating lure and you had a pretty good micro bottom bait that could be twitched enticingly along the bottom of the canal.
This worked for a while, but I grew frustrated with the amount of algae I’d pick up which fouled the rig rendering it unusable for much of a retrieve. It also retained the pendulum effect on a high water retrieve and didn’t lend itself too well to fishing for species more up in the water. I needed a jig, the ultimate SUL jig!
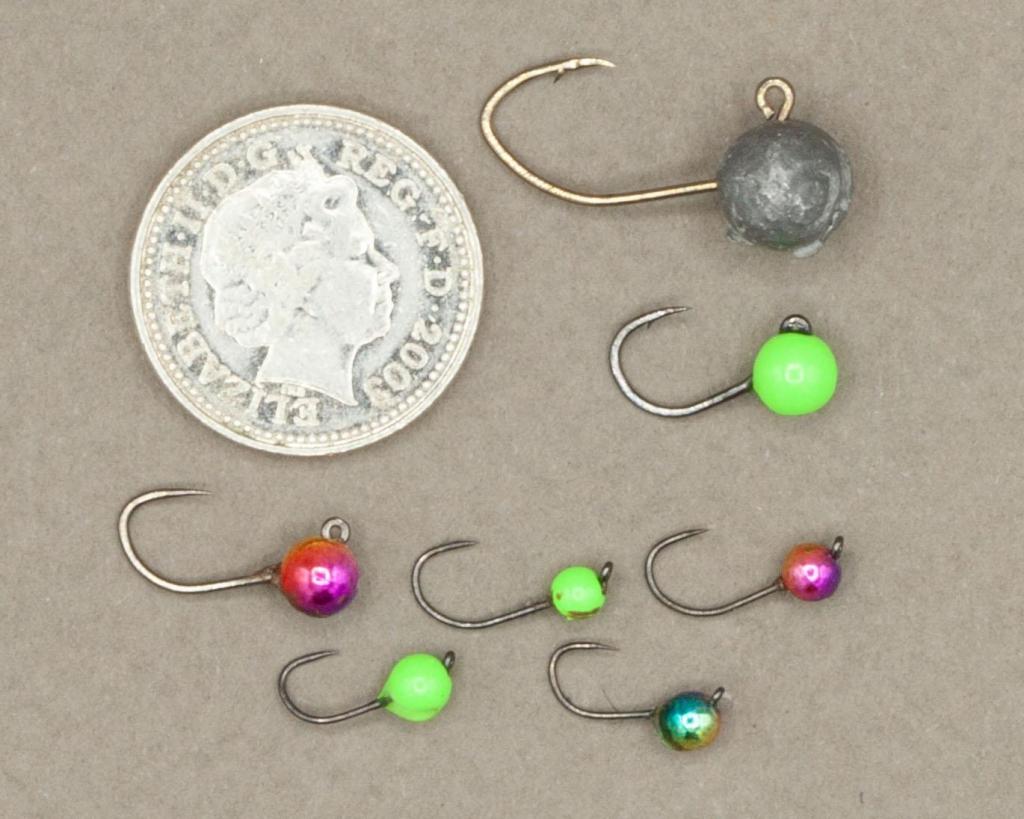
As you can see below compared to a standard small jig like a 2g size 8 these are far more finessed and perfect for SUL style fishing.
Hooks. My choice of hook is based on multiple factors. I want the finest gauge wire in the smallest sizes with the sharpest points. An upturned eye and downturned barbless point. Barbless is a must due to the fine lines and potential for break offs coupled with smaller fish just being much harder to unhook if they really inhale a light bait.
The best I’ve found to date being the ‘Partridge Fine Dry SLD in sizes 14 through 18. These come in packs of 25 and are now the basis for all my jigs.
Weights. Tungsten is a must, far denser and compact than split shot. You get the maximum efficiency in size to weight ratio but at a cost. They’re not cheap but affordable enough in packs of 50 and available online through various fly-tying supply companies, I use Rede River for mine. These also have the added advantage of multiple colour choices in a hard-wearing UV reflective enamel. These are just bang on in weights ranging 0.5g down to 0.15g at 2mm.
A quick tip here; I weigh mine in bags and divide out by the number marking the bag with a sharpie as the weight isn’t listed and it’s good to know.
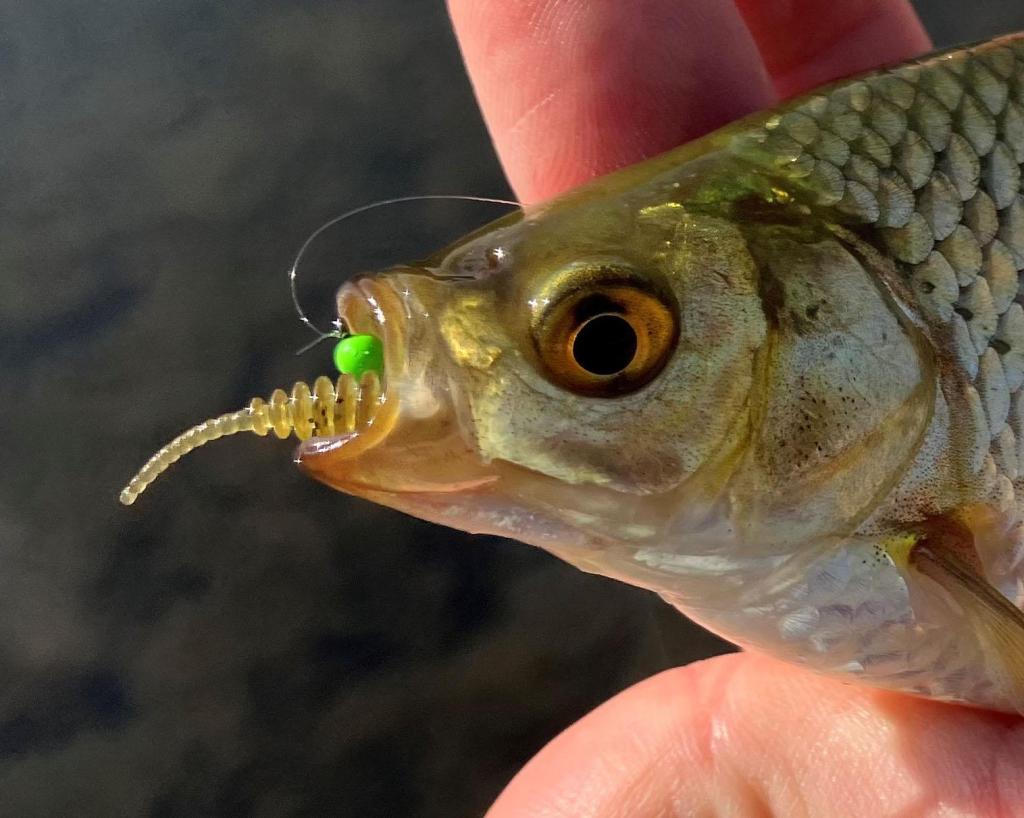
Colour matters but more to me than the fish. I use either rainbow flash or UV glow green. The flash beads create a little sparkle that help attract the attention of fish in the clearest water.
UV green are for my benefit more than the fish. At up to my maximum casting range, I can see these in the water with a decent pair of polaroid’s and I know that when ‘the light goes out’ the whole jig is in the fishes’ mouth before I feel the take. This can be critical to success when fishing sub-surface for finicky roach.
With a variety of weights made up in my bag I can delicately balance the lure to present at just the right fall rate to counter the buoyancy (or lack of) in the trailer. This is what I’ve come to call critical balance and that’s a whole other topic which I’ll cover another time.
Adhesives. Fixing these tiny beads to equally tiny hooks was the last part of the puzzle. I started with UV resin with some success.
The main problem is that it’s hard to get the UV resin into the slot rather than just being a blob stuck to the outside under surface tension. The UV lamps would also not reliably cure the UV within the bead’s slot, and I had a few become lose mid-session.
UV resin also tends to flow into the eye of the hook and not be noticeable until you go to tie one on. Working the eye clear with a safety pin in early dawn light is the very definition of infuriating.
Inspiration for the solution came from my experience in model making. Two-part epoxy clay or poly putties are a staple filler / adhesive in miniature modelling and a single pack of ‘Green Stuff’ will provide enough clay to make a lifetime supply of micro jigs. Easily available on eBay or Amazon this is perfect for the task.
Green Stuff is a modelling clay packaged as two strips of yellow and blue plasticine like putty. Cutting a strip off and mixing in equal parts will create a sticky green ball. Once mixed it will start to cure, gradually losing its tackiness before setting completely hard in about eight hours.
I’d recommend having some water on hand. Wetting your fingers and tools will prevent it sticking more to you than the jig while you’re working. You can also store it in water after mixing it to delay the curing time if you need to take a break.
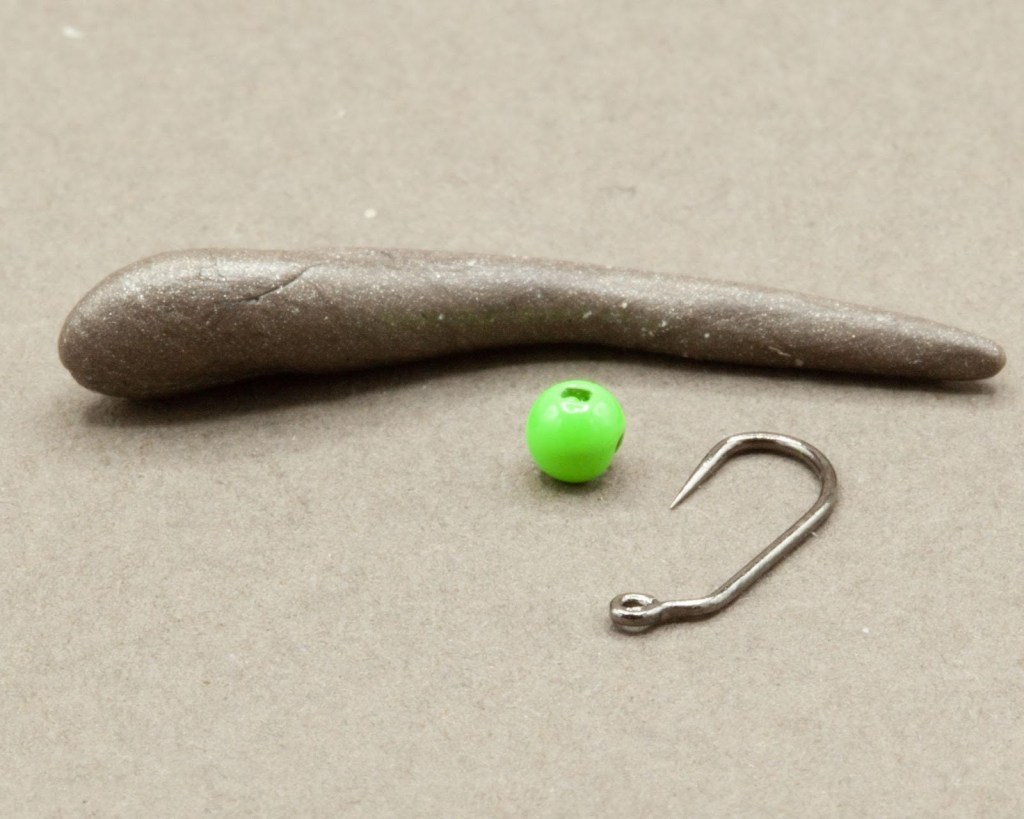
My process. Find yourself a clear desk space and set up the parts shown below.
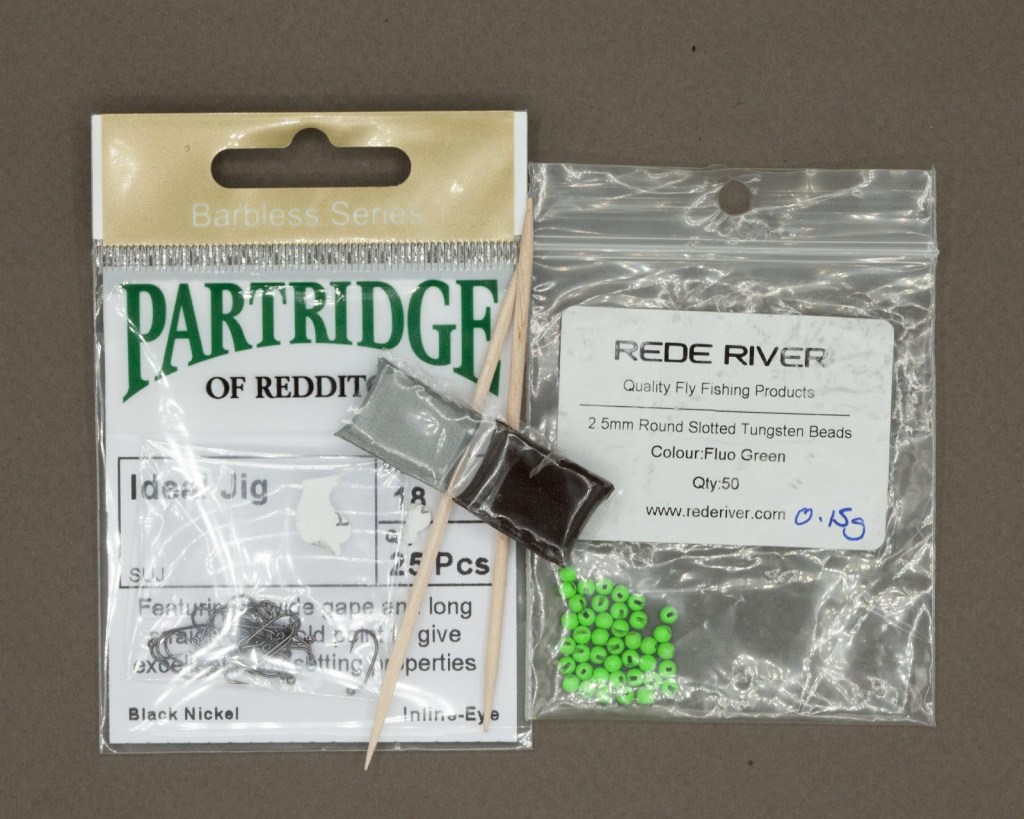
Mix up the putty (in this case I’m using a brown version) and pick out a hook and bead.
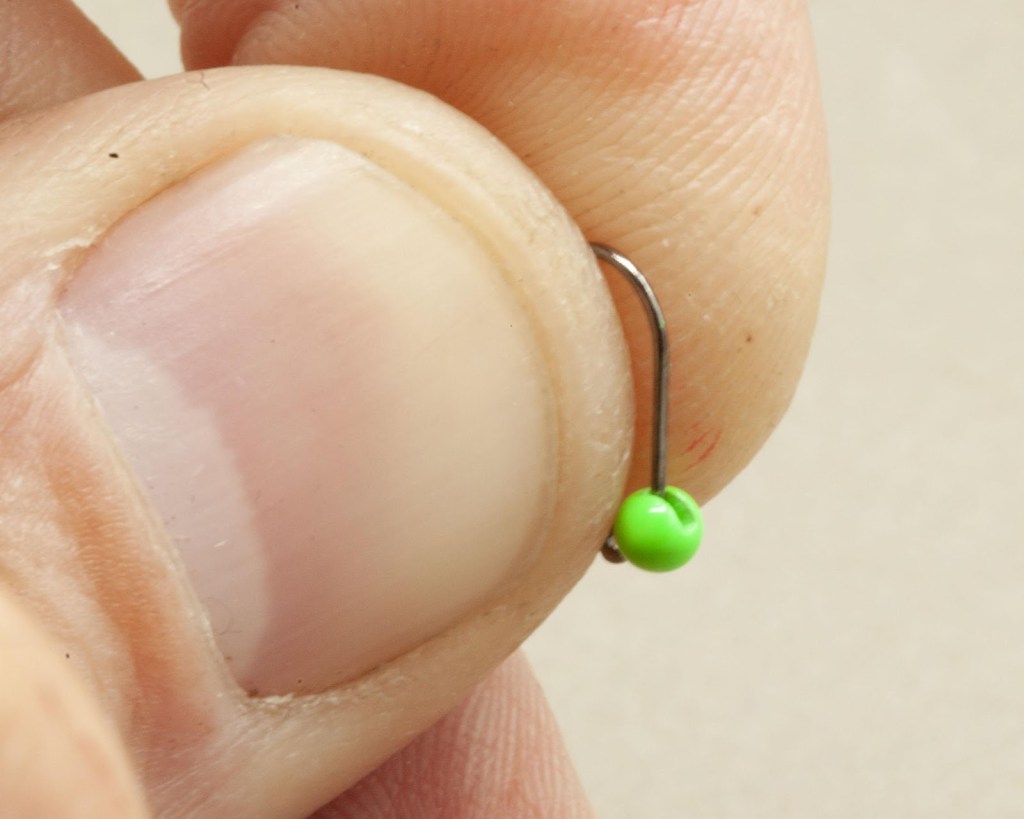
Rotate the bead and insert the point through the smaller slot then position the long slot to hang down below and to the rear setting most of the mass of the bead bellow the line of the hook shank. This ensures the jig will run true and stay upright.
Using the cocktail stick, stuff the slot with small amounts of putty at a time until you can’t get any more in.
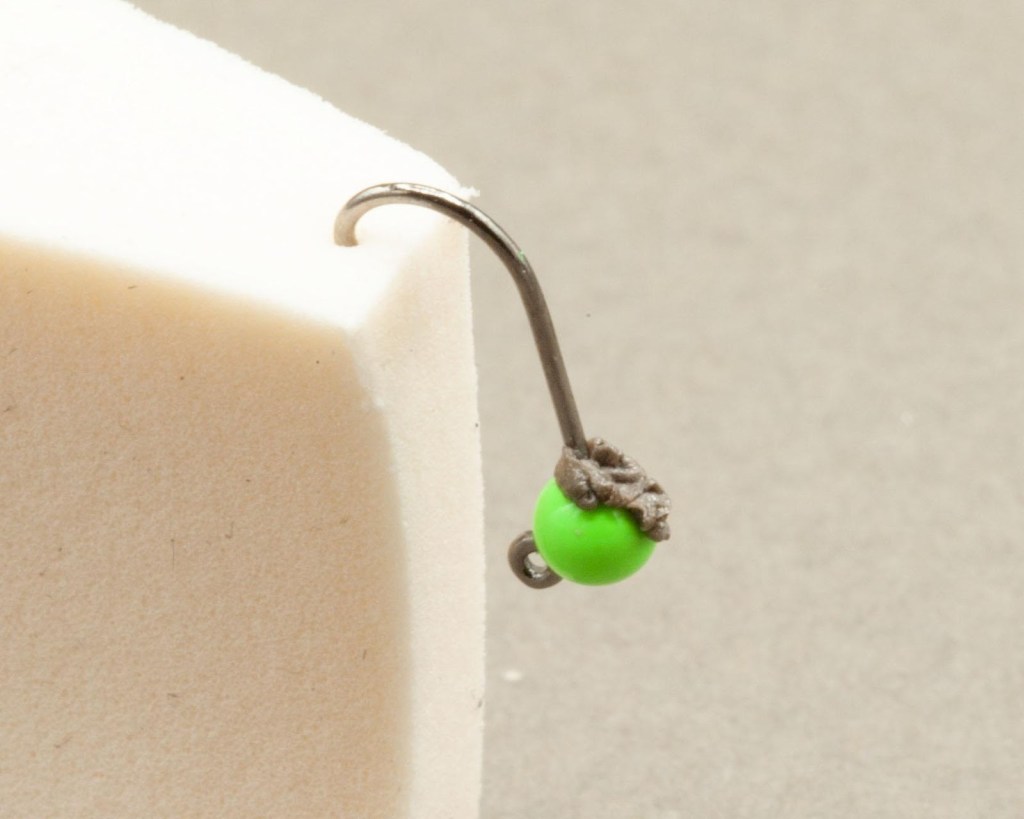
Finally, wet the cocktail stick and scrape the excess off flush with the edge of the slot and then check the hook is sitting correctly inline before putting it aside for 8 hours to cure.
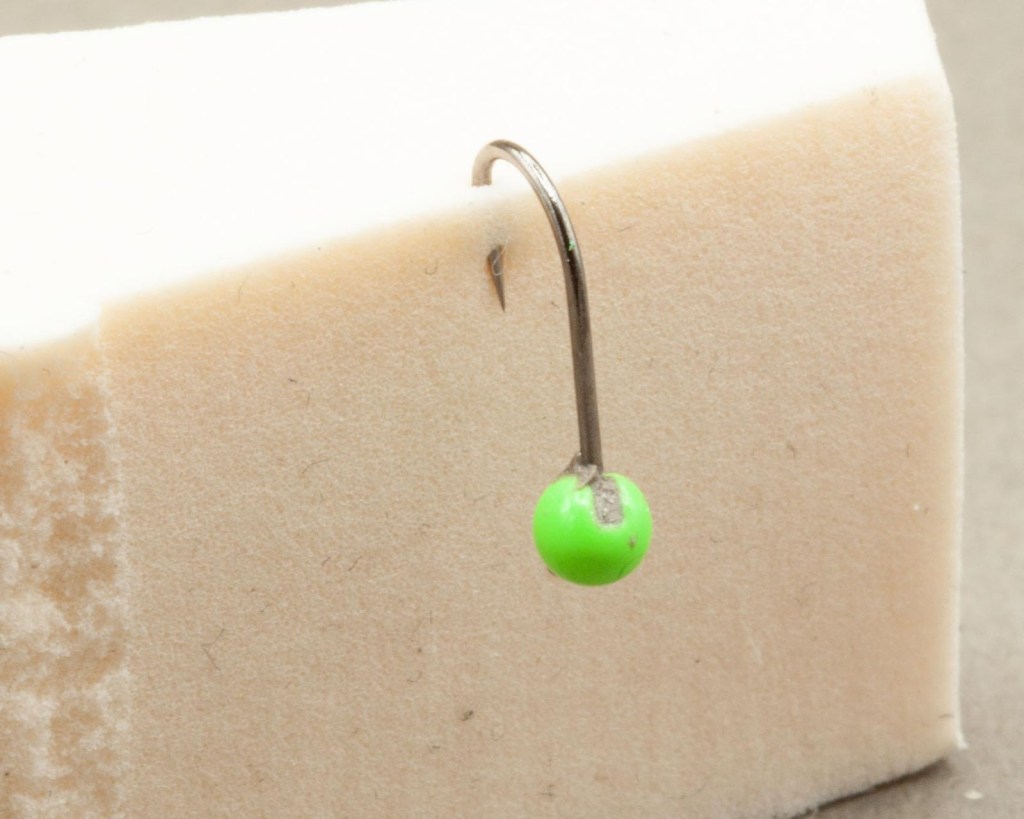
Repeat that process as many times as you need. I normally make up three of each size in three different weights in my chosen colour. This doesn’t take long once you get going and will provide enough jigs to last many sessions.
As for the tackle, lures, and the fishing itself; well, that’s another article all in itself.
